Creating an Order
Creating an order with Skipify is super easy!
Overview
The Skipify SDK utilizes callback functions to handle API calls and return data back to you.
To use this SDK callback, you first need to pass in an object with an asynchronous function to the orderDetailsCallback property. That function accepts an actions argument that can be used to create orders and calculate shipping/tax. You will use the createOrder method to create orders.
new window.GoCartSDK.Button({
  orderDetailsCallback: async (actions) => {
    actions.createOrder({
      // Order data will go here
    })
  },
  // Details for other callbacks can be found in the 'Callbacks' page
}).render(“my-button-container”) // Details for this can be found in the "SDK: The GoCart Button" page
NoteThe
orderDetailsCallbackfor the Skipify Button and Connected Checkout are identical, so the same process can be used for both.
Create Order
When creating an order, you will pass the details of the order to the createOrder method.
createOrder Parameters
The createOrder method accepts an object with the following parameters:
Field | Required? | Type | Examples |
|---|---|---|---|
lineItems | No, but highly recommended to show the customer detail of what they are purchasing. | Array | [ :] See the Line Items section below for additional details. |
subtotal | Yes | Number | 500 (for $5) |
total | Yes | Number | 500 (for $5) |
tax | No; can be used as an alternative to tax callbacks | Number | 50 (for $0.50) |
shipping | No; can be used as an alternative to shipping callbacks | Number | 500 (for $5) |
orderId | Yes | String | "your_order_id" |
orderDescription | Yes | String | "some_description" |
currencyCode | Yes | String | "USD" |
purchaseDetails | No | Array | [ ,] See the Purchase Details section below for additional details. |
Note
lineItemsandpurchaseDetails, accept arrays of objects.
createOrder Example
The orderDetailsCallback callback and its corresponding createOrder method should be formatted like the example below:
new window.GoCartSDK.Button({
  orderDetailsCallback: async (actions) => {
    actions.createOrder({
      lineItems: [ // Required parameter, but can contain an empty list. See section below.
        {
          name: "Jacket",
          amount: 1,
          SKU: "xrb-24", // Required parameter
          category: "Outerwear"
        }
      ],
      subtotal: 11500, // $115.00
      total: 12734, // $127.34
      orderId: "your_order_id",
      orderDescription: "winter sale",
      currencyCode: "USD",
      purchaseDetails: [ // Optional Parameter. See section below.
        {
          level: 1,
          label: 'Marco's Pizza',
          description: '3 items',
        },
        {
          level: 2,
          label: 'Pickup',
          description: '25 minutes',
        },
        {
          level: 3,
          label: 'Store Address',
          description: '5321 Florida Ave S\nLakeland, FL 33813',
        }
    })
  },
  // Details for other callbacks can be found in the 'Callbacks' page
}).render(“my-button-container”) // Details for this can be found in the "SDK: The GoCart Button" page
Create Order - Line Items
The createOrder method accepts an array of line items. The lineItems field must be included when creating an order, but can contain an empty array.
Best PracticeSkipify recommends including a full list of line items so they can be referenced in the future.
lineItems Parameters
Field | Required? | Type | Description |
|---|---|---|---|
Name | No | String | The name of the line item |
Amount | No | Number | The total for the line item. ex: 525 for $5.25 |
SKU | Yes | String | The stock keeping unit for the line item |
Category | No | String | The category of the line item |
Create Order - Purchase Details
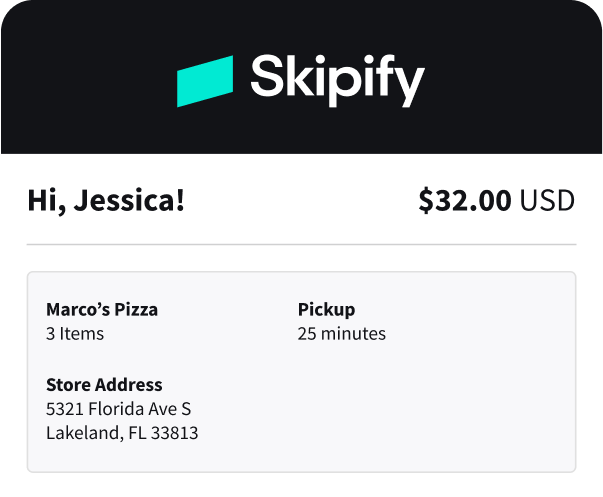
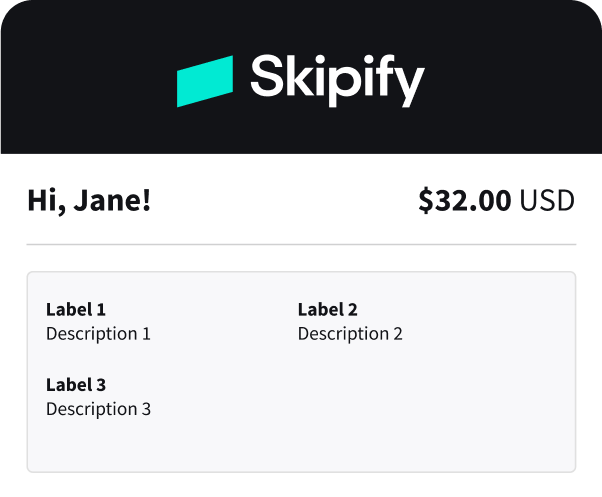
Purchase Details allows you to provide additional information about an order to your customer within the Skipify wallet. In the following example, this feature appears in the top of the Skipify wallet and allows you to pass text-based information to your customers.
Given the flexibility of Purchase Details, you can choose to provide customers with many different types of information. The image below includes an example where a merchant is providing details about the item count, store address, and pickup time.

You can demo this feature in the Merchant Portal!Skipify provides a mechanism for demoing the Purchase Details feature which can be helpful prior to implementation.
purchaseDetails Parameters
When an order is created, you can provide up to three labels with corresponding descriptions. The text fields accept plain text, but additional styling is not currently supported.
Important!Labels and their corresponding descriptions must be passed in together
Field | Description | Example | Output |
|---|---|---|---|
level | This dictates the placement of this purchase detail. The levels 1, 2, and 3 correspond to the placement of the labels/descriptions below. | 1, 2, or 3 | See example of placement below |
label | The label for this purchase detail. These fields can accept a maximum of 30 characters. | Address | Address |
description | The description for this purchase detail. Levels 1 and 2 can accept a maximum of 30 characters. Level 3 can accept a maximum of 105 characters. It can also accept a line break when including a | 3319 Washington St.\nDenver, CO 80213 (Note the \n character between 'St.' and 'Denver') | 3319 Washington St. (Note the line break between 'St.' and 'Denver') |

And that's it! You've created an order with Skipify.
API ReferenceOur API Reference contains additional details about an endpoint used by this callback.
Updated 4 months ago

