Viewing and Managing Paylinks
Learn how to view and manage previously created Paylinks
Viewing Paylinks
There are two ways to view Paylinks that have been sent:
Recently Sent Paylinks
The five most recently sent Paylinks will appear on the Send Paylinks tab within the Paylinks page

View All Paylinks
The View all Paylinks tab within the Paylinks page offers a more detailed view with options to search and filter.
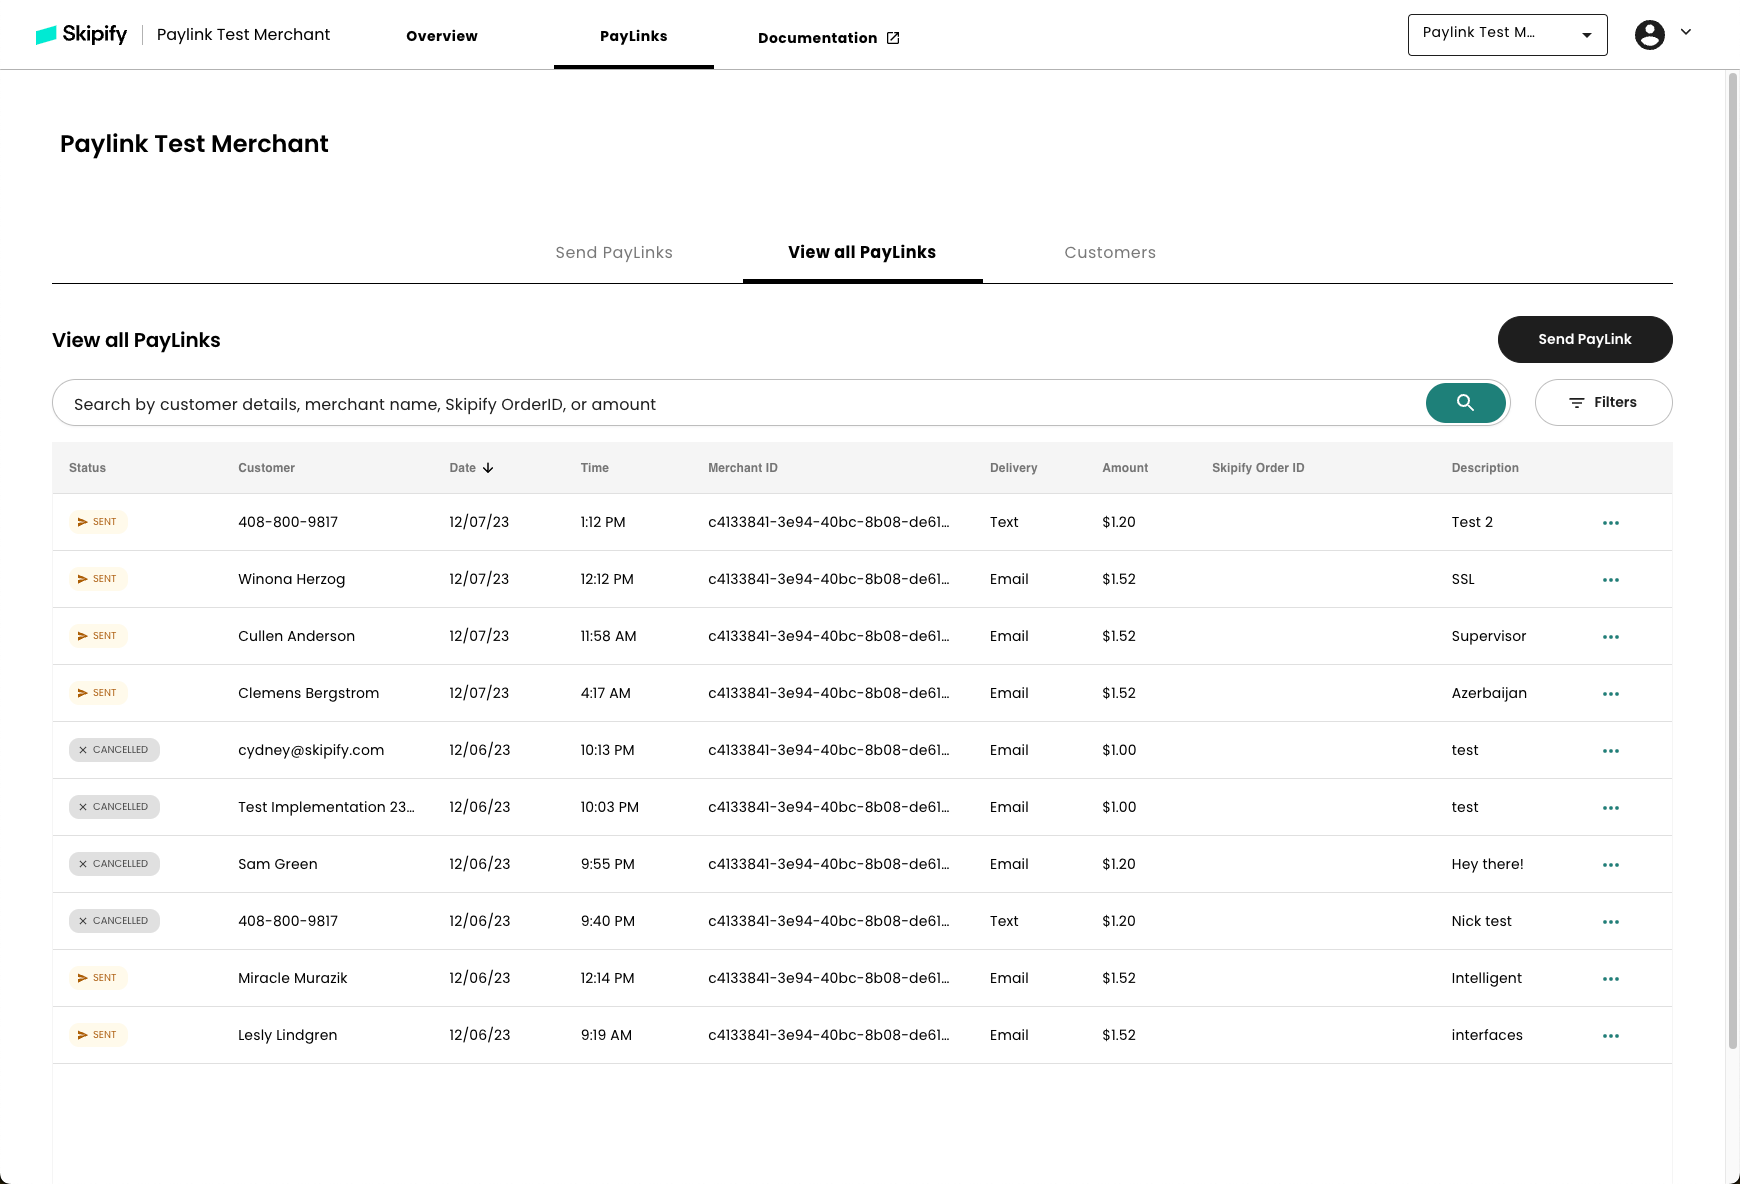
Search
The search bar allows you to search for Paylinks using the following:
- Customer details
- Merchant name
- Skipify OrderID
- Amount

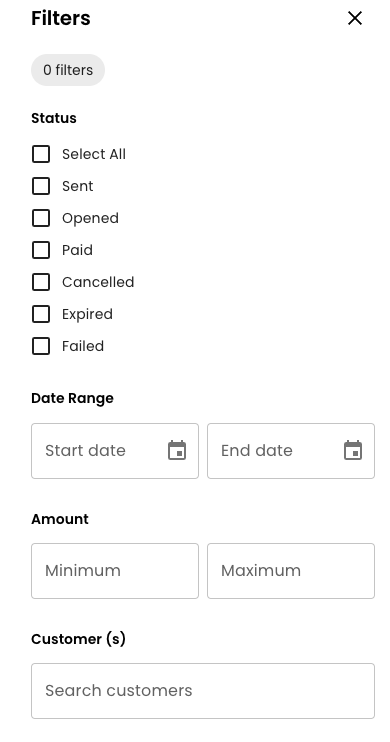
Filters
Filters allow you to further refine your search by:
- Status
- Date Range
- Amount
- Customer(s)
Managing Paylinks
Paylinks Status
The options available for managing Paylinks depend on the link's current status:
Sent - The Paylink has been delivered but not opened
Opened - The Paylink was opened but payment has not been submitted
Paid - The Paylink has been paid in full
Canceled - The Paylink was canceled by the merchant
Expired - The Paylink expired before payment was submitted
Failed - The Paylink was not delivered
Recently Sent Paylinks
From the Send Paylinks tab within the Paylinks page, you can manage the five most recently sent Paylinks.
Expanding the Paylink frame by clicking the down-arrow allows you to view the available management options and more details such as the:
Merchant Name - The name of the merchant who created the Paylink
Expanding the PayLink frame by clicking the down-arrow allows you to view the available management options and more details such as the:
Merchant Name - The name of the merchant who created the PayLink
Description - A message or identifiers such as invoice or order numbers
Skipify OrderID - Skipify's unique identifier for the Paylink
History - Displays all changes in the Paylink's status

View all Paylinks
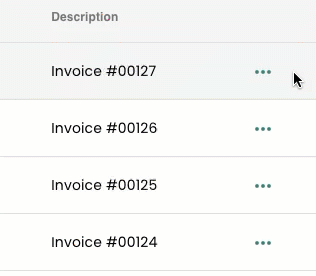
You may also manage Paylinks from the View all Paylinks tab within the Paylinks by clicking on the more horizontal menu.
Manage Options
Depending on the status, the following options are available when managing sent Paylinks:
Edit
The edit option allows you to update the Paylink's description and expiration date. Any additional changes require you to cancel the Paylink and create a new one.
Example : There was a mistake in the invoice number that was added to the description field.
Resend
This option allows you to resend the Paylink. This option is not available for Paylinks which have already been paid.
Example : The customer accidentally deleted the text or email before they could submit payment.
Cancel
Canceling a Paylink will prevent the recipient from making a payment using that specific link. This action voids the Paylink and can only be used if payment has not been collected.
Example : The incorrect amount was entered when the Paylink was created.
Refund
Refunds may be processed in full or partially. When processing a refund, you will see the following information:
Available amount to refund - This is the remaining balance that has been paid by the customer.
Example : If the paid amount totaled $5.00 and a refund had previously been issued for $2.50, the current Available amount to refund would show a remaining balance of $2.50.
Refund amount - This is the amount you will be refunding on this transaction based on the amount entered in the Refund Amount field.
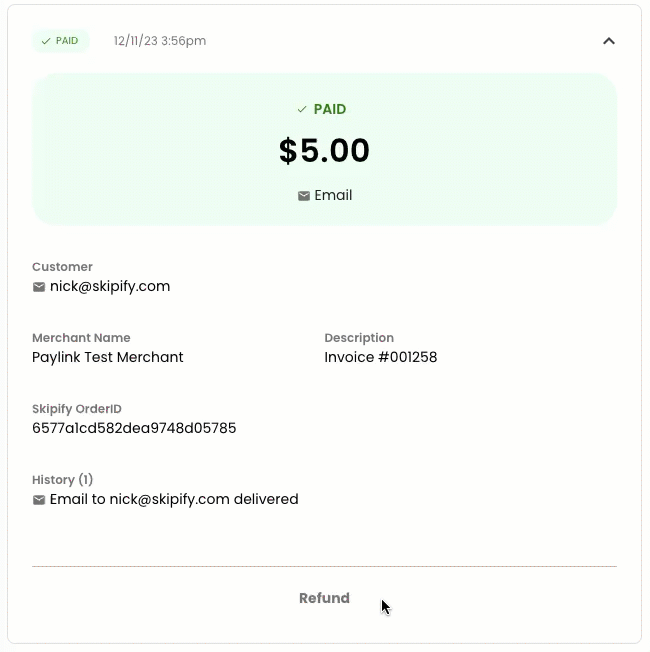
If a Paylink has been fully refunded, a banner will be displayed and you will be unable to refund any additional amounts.

NoteAll transactions may be refunded in whole or partially regardless of the customer's enrollment to Skipify

Updated 4 months ago