Creating and Sending a PayLink
Learn how to create and send PayLinks
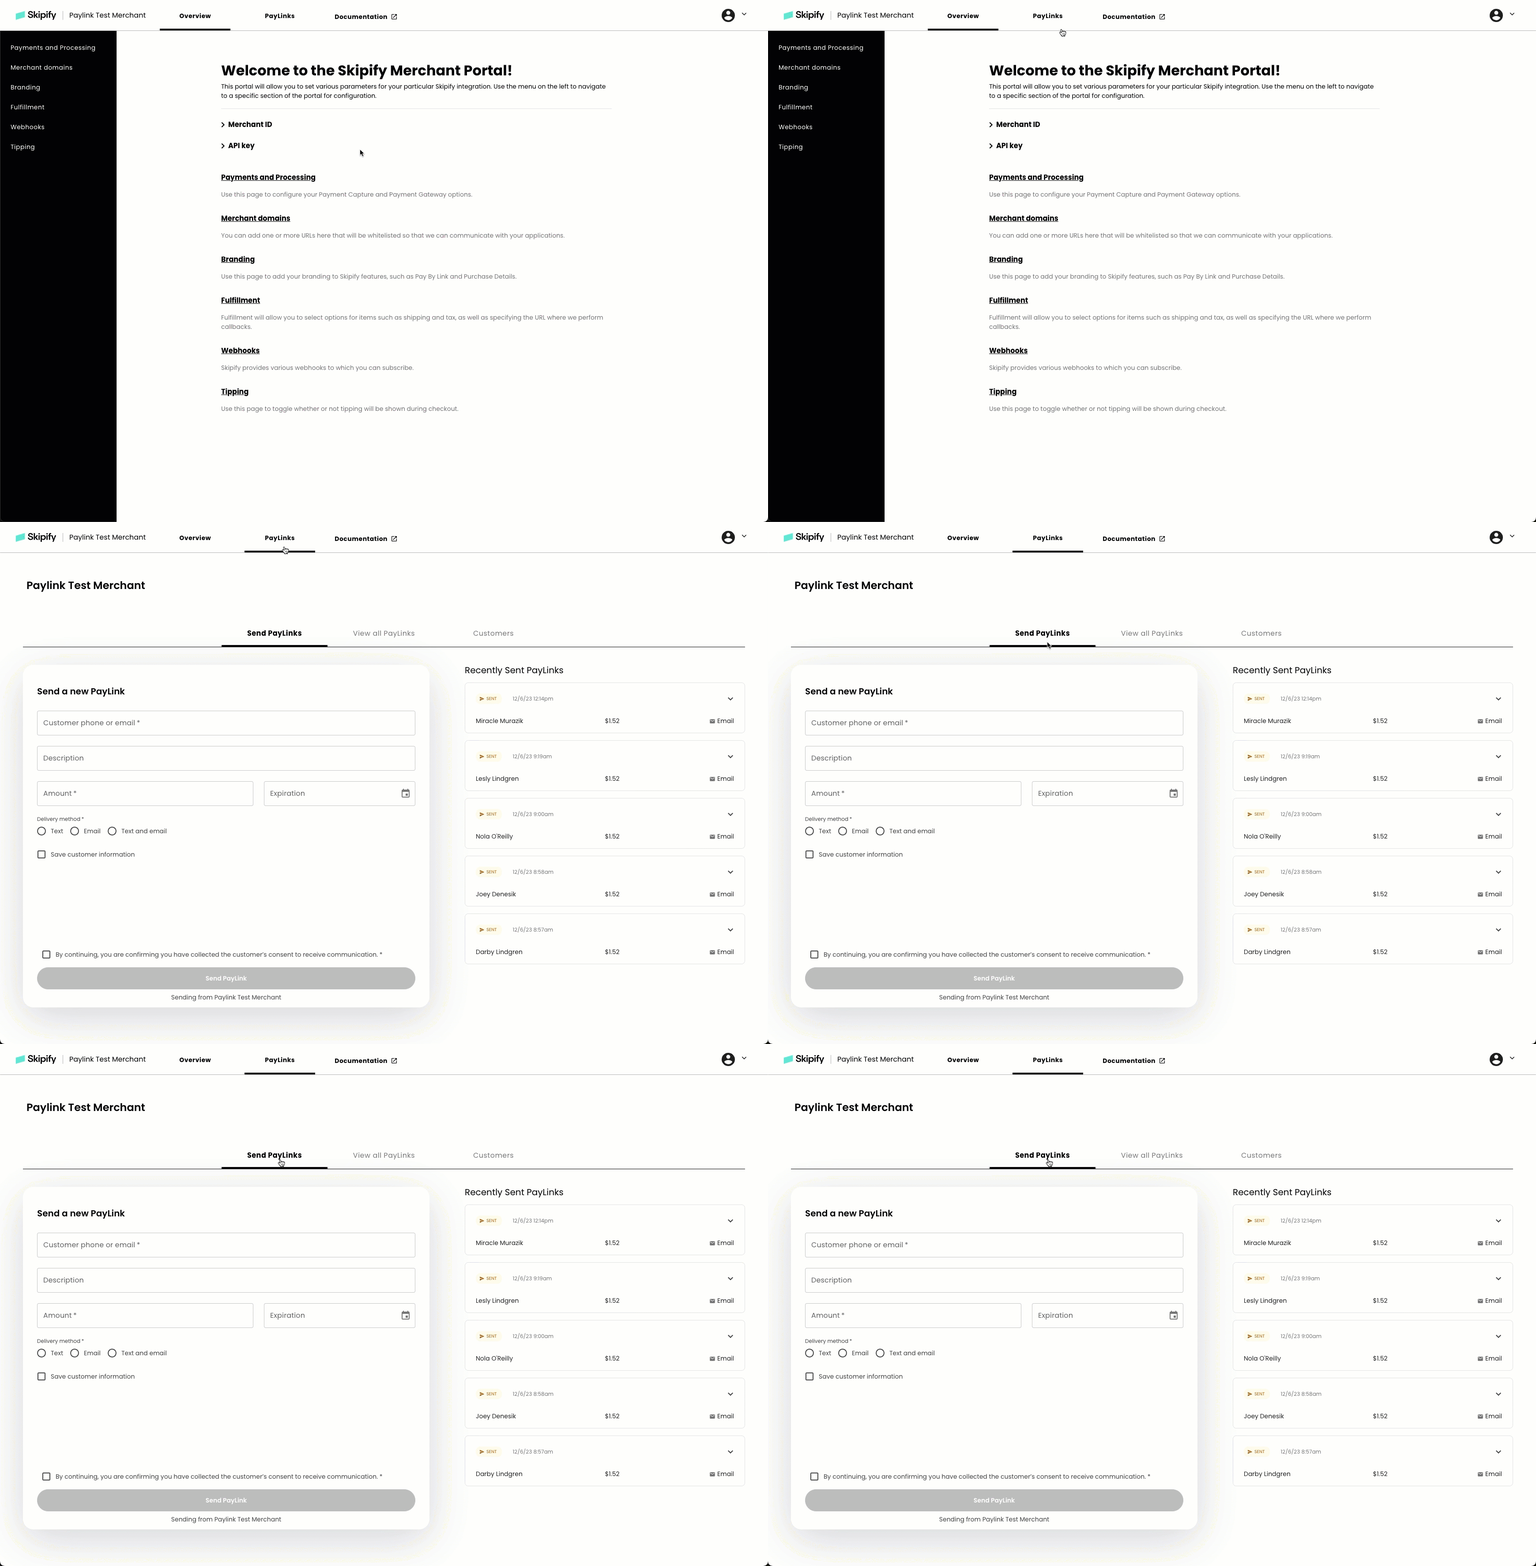
Within the Merchant Portal, navigate to the PayLinks tab and select Send PayLinks.

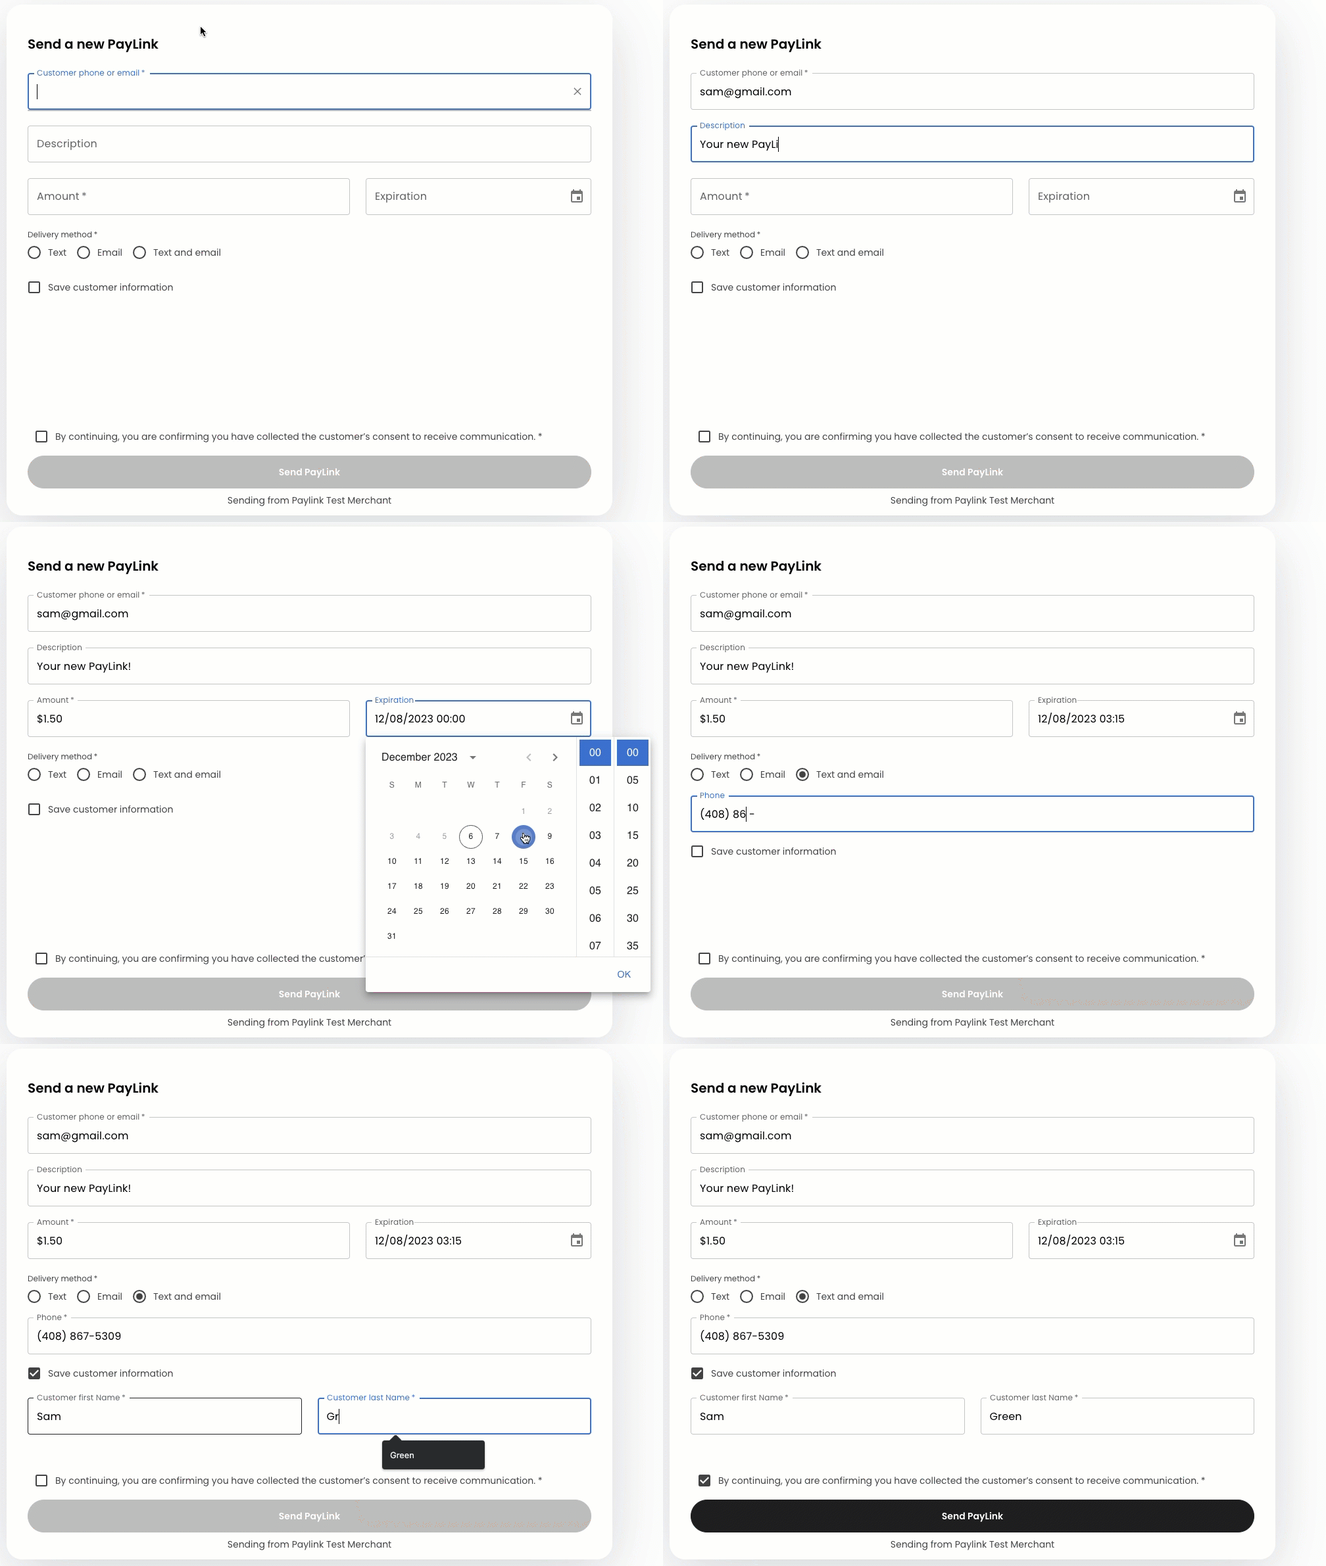
The Send a new PayLink section contains the following options:
Field | Required | Description |
|---|---|---|
Customer phone or email | Yes | The phone number or email the customer would like the PayLink sent to Note: Returning customer's information will automatically populate as you begin typing |
Description | No | A custom field that can contain a message or identifiers such as invoice or order numbers
|
Amount | Yes | The full amount due as reflected on the customer's invoice |
Expiration | No | The date and time at which you would like the PayLink to expire. Expired PayLinks are no longer payable. |
Delivery method | Yes | How the customer would like to receive the PayLink Note: When the Text and email option is selected, a new field will appear for the additional delivery method if the customer's information has not been previously stored |
Save customer information | No | Selecting this option will save the account for future use Note: This requires two additional fields - Customer first name and Customer last name |
After completing the form, you will need to select the confirmation check box which confirms that you have collected the customer's consent to receive communication, followed by clicking Send PayLink
ImportantThe PayLink will be sent as soon as you click Send PayLink. PayLinks can not be scheduled to send at future dates at this time.

ImportantHave your customers check their junk folder if they are not seeing the PayLink email
Updated 5 months ago

