BigCommerce
Learn how to integrate with BigCommerce
Before You Begin
There are a few items that need to be in place before you start the integration:
Optimized One-Page Checkout
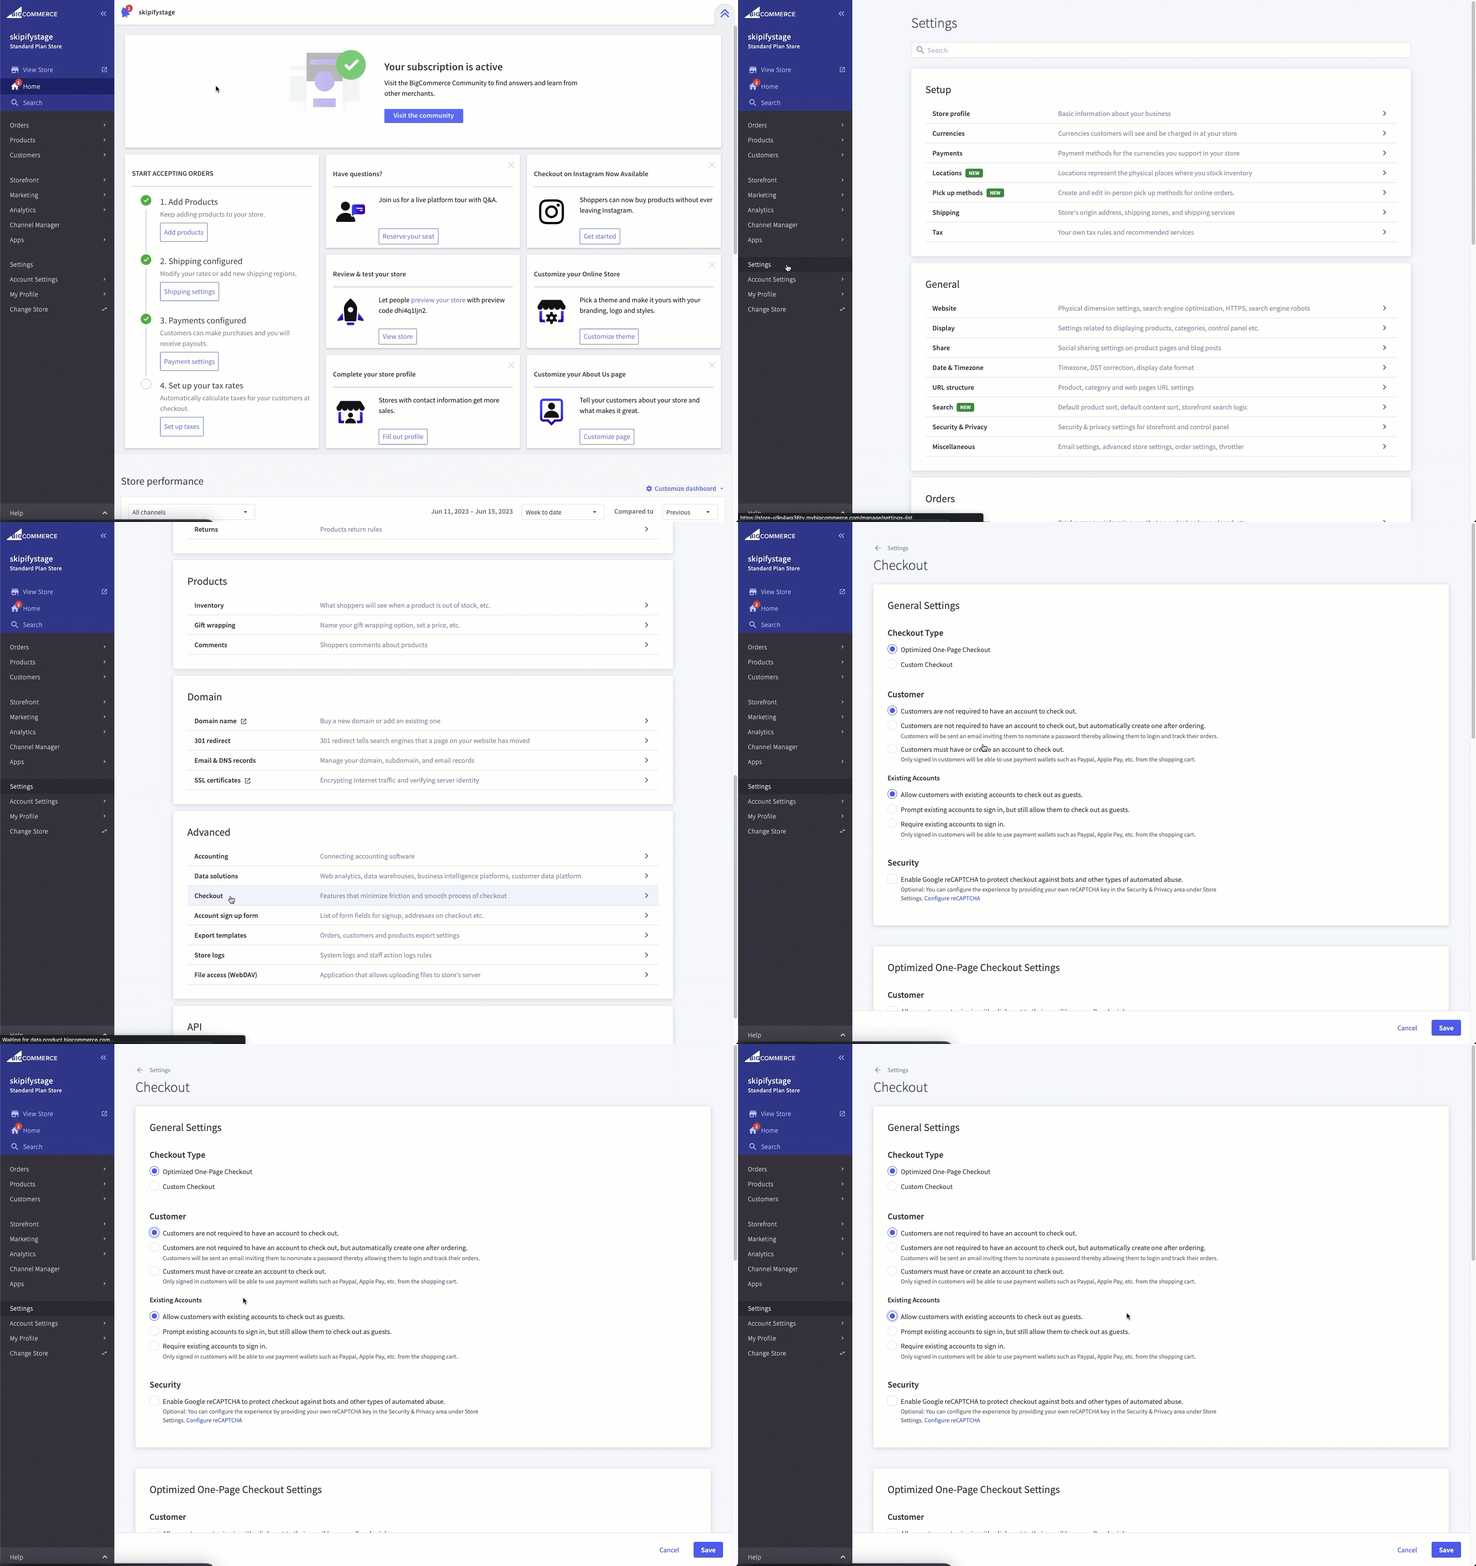
Skipify Connected Checkout initiates with email recognition, so to ensure a seamless shopper experience, you should ensure the email field is on the top of the checkout page. We strongly recommend using the Optimized One-Page Checkout which can be enabled by doing the following:
- Login to the BigCommerce Control Panel
- Click on Settings > Advanced Settings > Checkout
- Select Optimized One-Page Checkout

NoteIf you’re leveraging a Custom Checkout, the email address field must be on the top of the checkout page. You will be able to modify your layout under Checkout Styling > Open Page Builder.
Enable Guest Checkout
Skipify’s Connected Checkout solution allows each guest to experience a frictionless checkout flow with all of the benefits of a returning customer journey. Here's how to enable guest checkout on BigCommerce:
- Click on Settings > Advanced Settings > Checkout
- Under the Customer heading, select Customers are not required to have an account to check out
- Under the Existing Accounts heading, select Allow customers with existing accounts to check out as guests

Set Currency to USD
At this time, Skipify only enables transactions in USD (US dollars). To set the default currency:
- Click on Settings > Setup > Payments
- Select USD (US DOLLAR) from the Show payment methods for dropdown menu
Important!Even if you complete transactions in other currencies, the default MUST be set to USD

Best PracticeRequiring a shopper's phone number is totally optional, but it will allow returning customers to have the best possible checkout experience
Requiring a Phone Number
- Click on Settings > Advanced Settings > Account sign up form and select the Address Fields tab
- For Phone Number click ••• under the Action column and select Edit
- Click the checkbox next to Yes this field is required and click Save

Setup Skipify Connected Checkout
Now that the requirements have been met, it's time to setup the Best Checkout Ever!
Install the App
- In your BigCommerce dashboard, click on Apps > Marketplace then click the blue BIGCOMMERCE.COM/APPS button
- Type Skipify into the search bar and click on the tile
- Click the GET THIS APP button
- Log in to your existing store and follow the prompts to complete the installation

Getting an error?Please reach out to [email protected] and we'll get that resolved
Let us Know that You're Ready to Go!
Once you've completed the steps above, please reach out to your favorite Skipify integration manager, or email us at [email protected]. Our dedicated team will walk you through the final items, test everything out, and make sure you're good to go!
Updated 5 months ago

