Adyen
Learn how to connect your Adyen account
Adyen Merchant Account
First, you'll need an Adyen merchant account. You can sign up for a test account which will let you get started with Skipify in a sandbox environment. Once you're ready to move forward, you'll need to reach out to Adyen to get a production merchant account.
We're here to help!You can always reach out to your favorite Skipify representative if you have any questions!
Payment Gateway Credentials
Deciding on a Merchant Account
Adyen has a two tiered account structure where transactions are processed at a merchant account level, and payouts are made to the bank account associated with that merchant account.
You can setup one Adyen merchant account per Skipify child account, or use the same Adyen merchant account for multiple Skipify child accounts. If you’re unsure, please work with your favorite implementation manager to determine what’s right for your business.
You can view a list of available merchant accounts within the Adyen customer area by selecting the dropdown menu on the top-left of the screen.

API Keys
Skipify uses your API credentials to send transactions to Adyen on your behalf. To do this, we use the API key provided for your web service user.
If you already have a web service user and have access to the API key, please send it over to your Skipify implementation manager.
To generate a new API key
Within the Adyen customer area, select Developers > API credentials

Next, you'll need to choose the web service user you'd like Skipify to use, or you can create a new one.
Important!Make sure you pick a web service user, NOT a reporting user!
Click on your preferred user to generate a new API key.

WarningGenerating a new API key will invalidate any existing API keys for that web service user.
Enable Card Brands
Select Settings > Payment methods and choose the card brands you would like to accept

Supported CardsSkipify currently supports American Express, Visa, MasterCard, and Discover!
Capture Settings
To configure your capture settings, select Settings > Account settings and click Capture delay

Any of the Adyen capture settings will work with Skipify. If you choose immediate capture, your Skipify account must also to be set to immediate capture. If you choose a capture delay or manual capture, your Skipify account must be set to manual capture.
Configure Web Service Account Permissions
Skipify is a PCI Level 1 vendor and will need to send raw PAN data to Adyen. As such, the web service user you use for Skipify will need permission to send raw PAN details. Please reach out to [email protected] and provide them with your merchant account and web service ID to have this enabled. Make sure you mention that this is for a Skipify integration!
Notifications
Adyen uses notifications to inform merchants about asynchronous events such as manual captures or chargebacks. If you would like to receive these notifications, you’ll need to configure this directly with Adyen.
Skipify Merchant Portal
Next, you'll need access to the Skipify Merchant Portal. If you need an account, your favorite Skipify integration manager can get you setup quickly, or you can submit a request here!
NoteYou'll need Adyen test credentials for the Skipify staging sandbox and Adyen production credentials for Skipify production.
Set Adyen as your Payment Gateway
Log into the Skipify Merchant Portal and click on the payments and processing tab.
Select Adyen as your payment gateway. In the provided fields, enter your Adyen merchant account and web service user API key.
Getting an error message?Please check that the credentials entered are for the correct environment. If you're still having issues, your favorite Skipify implementation manager is happy to help!
Choose your Capture Settings
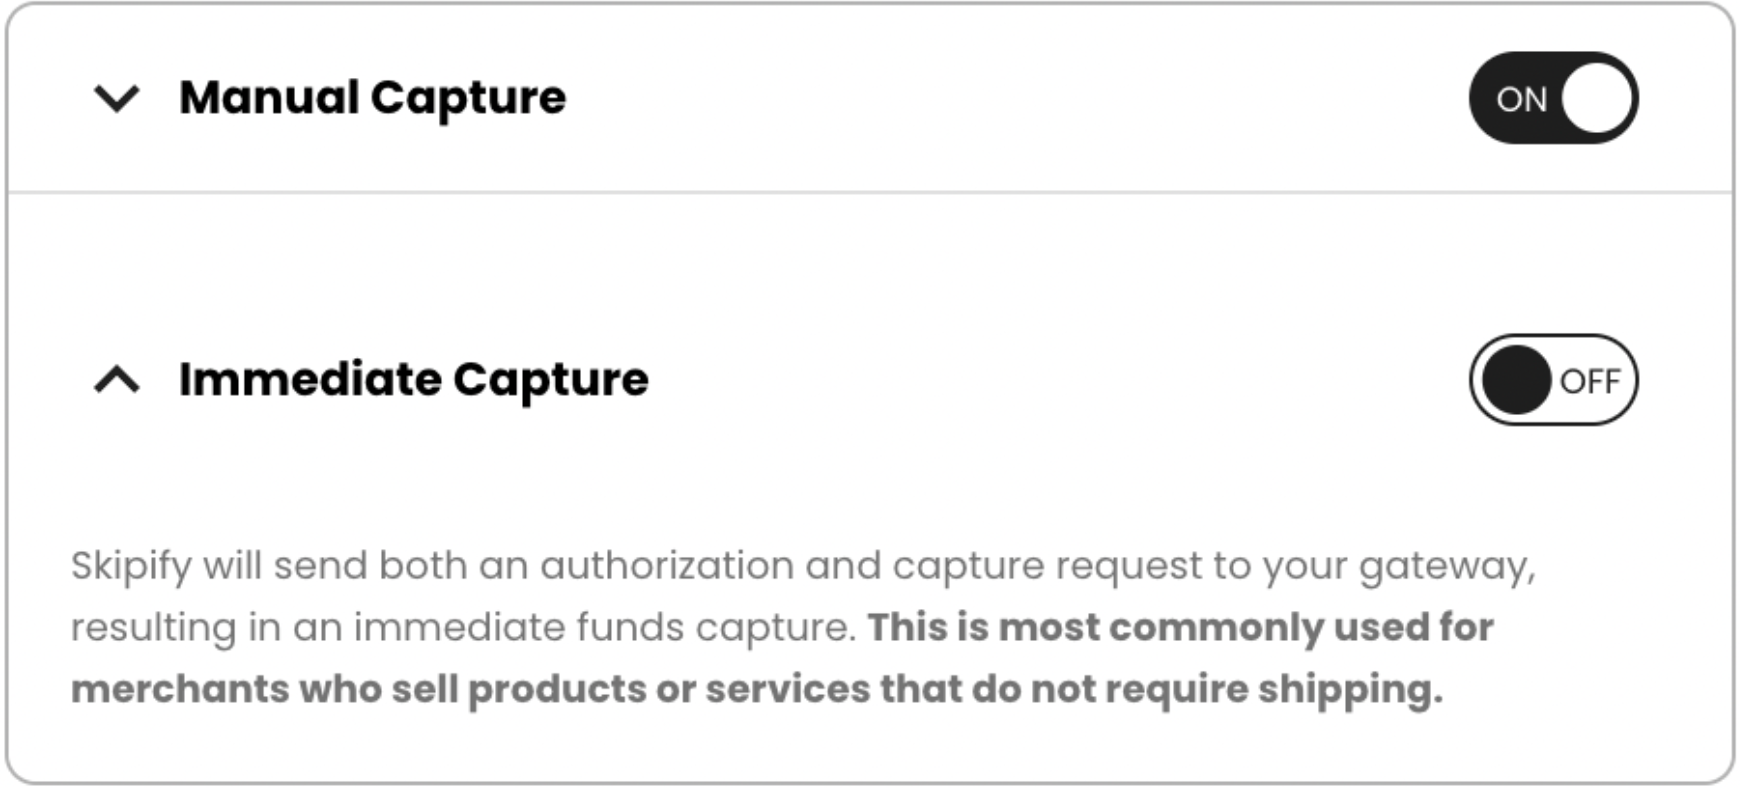
Use the toggles to select the capture setting that suits you best:
Manual Capture is usually used by merchants who ship physical goods and need to hold off on capturing funds until the items are ready to go. With this option, Skipify will only send an authorization request to your payment gateway. You will be responsible for capturing funds when you're ready, either directly with your gateway, or via Skipify's capture endpoint.
Immediate Capture is usually used by merchants who have already provided a service, or who provide access to digital goods once authorization is complete. With this option, Skipify will authorize and capture funds at the same time.
Updated about 2 months ago