SDK: Consumer Enrollment
Know when your consumers want to sign up for Skipify
Make sure you read our Setting up the SDK section before proceeding!It contains all of the setup work required before you can instantiate the Customer Enrollment SDK Feature
For a high-level explanation of the enrolling new users process, please check out Enrolling New Skipify Users
Enrollment Checkbox
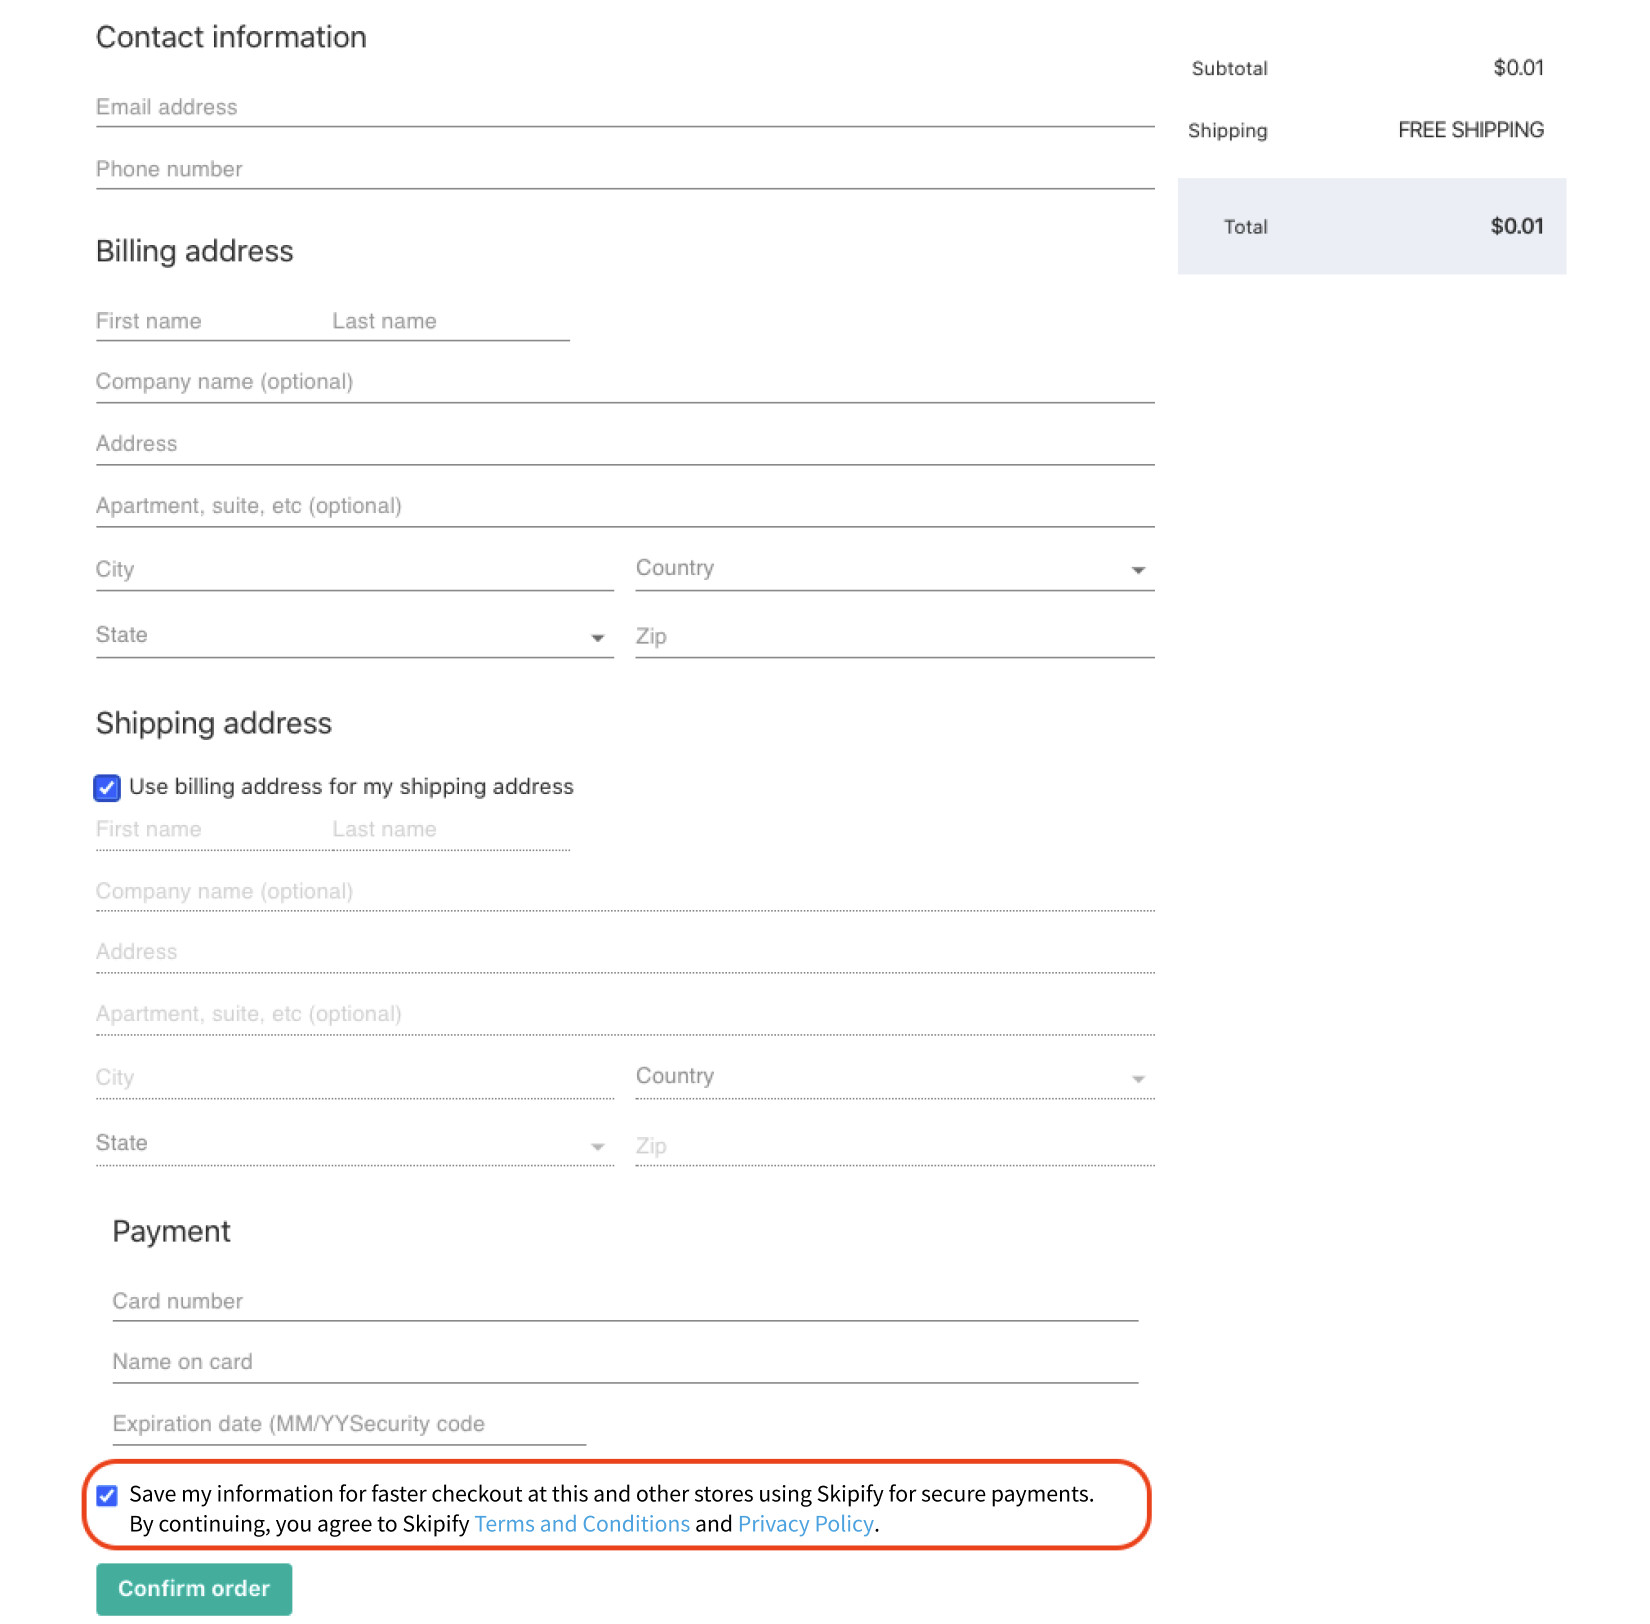
The enrollment checkbox allows you to know when a consumer is opting in to sign up for a Skipify account during the Connected Checkout experience. It should be used in conjunction with the enrollCustomer function once the customer has submitted their order.
The following image shows an example of where you may want to place the checkbox on your guest checkout form:

Rendering the Checkbox
You can insert Skipify's enrollment checkbox, Terms & Conditions, and Privacy notice by calling the render function. Pass in the enroll object with the id of the DOM element in which to place it, the default checkbox value, and an onChange callback function.
var shouldEnroll = true; // This variable is used in the logic for the "Enroll Customer Function" section below

new window.GoCartSDK.Button({
   orderDetailsCallback: ()=> {}, // Remember to include these (empty) required callbacks
   success: ()=> {},
   error: ()=> {},
   theme: 'light', // Optional; see below for additional details
 }).render({
   enroll: {
     id: 'gocart-enroll-container',
     defaultValue: true,
     onChange: (isChecked) => {
       shouldEnroll = isChecked
     }
   }
});
Best Practice!Pre-check this box in order to allow your consumers to sign up for Skipify seamlessly as they pay
Checkbox Theme
The Skipify checkbox and user agreement is designed to match a light theme:

It can also be set to match a dark theme by adding the optional 'theme' parameter and setting it to dark:

enrollCustomer function
If the checkbox is selected when the customer submits their order, you will need to call the enrollCustomer function. This will launch a modal that will handle enrolling the customer into Skipify using a one-time passcode (OTP) verification.
const submitOrder = () => {
  if (shouldEnroll) { // This references the variable in the code snippet from "Rendering the Checkbox"
    new window.GoCartSDK.enrollCustomer(customerInfo); // see subsections below for more details
  }
  // Insert your checkout logic here
}

// @returns response from the API for account verification
Skipify will use the customerInfo that you pass into the enrollCustomer function to enroll a customer. The fields for customerInfo are listed below:
customerInfo Fields
Field | Required? | Type | Description |
|---|---|---|---|
firstName | No | String | Customer's first name |
lastName | No | String | Customer's last name |
phoneNumber | Yes | String | The number used for OTP verification |
emailAddress | Yes | String | Customer's email to be associated with the account & phoneNumber for OTP |
paymentMethods | Yes | Array | An array of customer's credit/debit cards.
|
addresses | Yes | Array | An array of customer's addresses
The array may be empty |
customerInfo Example
{
  "firstName": "string", // Optional
  "lastName": "string", // Optional
  "phoneNumber": "string",
  "emailAddress": "string",
  "paymentMethods": [ // Can be empty array
    {
      "nickName": "string", // Optional
      "fullnameCard": "string",
      "cardNumber": "string",
      "expMonth": 0,
      "expYear": 0
    }
  ],
  "addresses": [ // Can be empty array
    {
      "firstName": "string",
      "lastName": "string",
      "company": "string", // Optional
      "address1": "string",
      "address2": "string", // Optional
      "city": "string",
      "state": "string",
      "country": "string",
      "zip": "string",
      "phoneNumber": "string" // Optional
    }
  ]
}
Updated 4 months ago

