Flow: The Skipify Button
Learn more about the Skipify Button
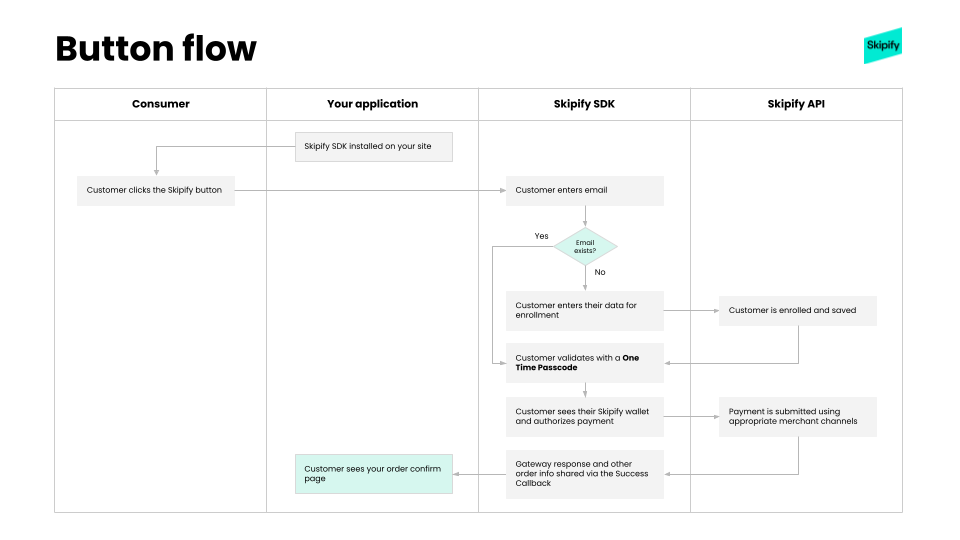
The Skipify button identifies existing Skipify users for faster checkout, or allows easy enrollment for non-Skipify users directly in the checkout flow.
Workflow Description
In this flow, a customer visits your checkout page, clicks on the Skipify Button, and enters their email address.
From here, one of two things can happen:
- The email address is not recognized
The customer can enroll in Skipify and then pay while staying in the same flow. - The email address is recognized
We provide the customer a one-time passcode (OTP) for verification, then they can pay without having to fill out additional fields.
In either case, we are submitting a payment on your behalf using your merchant and gateway credentials. After an order has been submitted, we share the results with you via the Order Success/Failure Callback. This callback provides you with information about whether or not the payment was successful, allowing you to render the appropriate page on your website.

Resources
The above workflow points out specific SDK features that you will need to employ in order to successfully utilize Connected Checkout. These include:
Updated 7 months ago

